

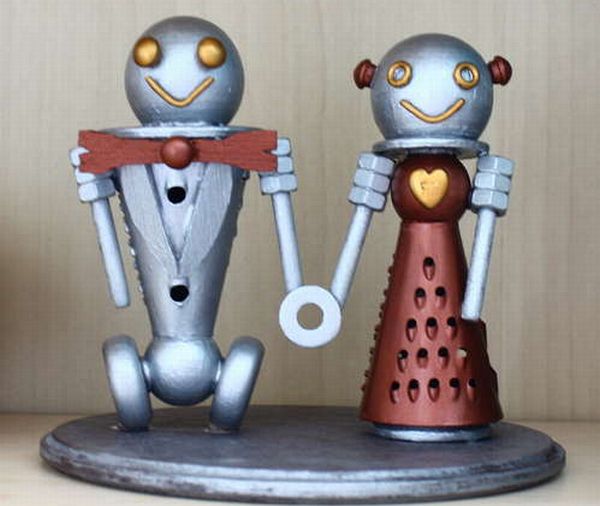
Have you seen any geeky wedding cake topper ever? If no, then here is one that you must see and make for a wedding of you own; or even if you are not getting married you must recommend this cake topper to a friend or known of yours who will be marrying soon. A good thing is that you can make it all by yourself without much to spend on its making process. So why wait? Just learn how you can make this robot cake topper and start up! You can even make it as a wedding gift toy you loved ones after you complete it.

Difficulty level: Easy
Time required: 30 minutes to 1 hour
Things needed

These will be the things that you will require in your DIY of making a robot cake topper:
· 2 Doll head with the knobs for head and the butt
· Wooden toy wheels
· Button plugs
· Dowel rod (to make robot arms)
· Mini cheese graters
· Nuts (upto 12)
· Wooden base
· Balsa wood
· Paint (acrylic)
· Hot glue gun
· Wire cutters
Procedure:
1. In your first step, you have to cut out the bow tie and the suit coat from the Balsa wood. You can make it of any shape but do keep in mind that it is for your robot. Use a pencil to draw the traces and then cut with the wood with the X-acto knife.

2. Take the wire hanger and cut it to make the mouths for the he and she robots. First cut a small piece of the wire from the hanger that can be found at any home. Bend it in shape that looks much like a robot smile. Well you will have to be creative in this part.

3. In your third step you take the acrylic paint and using a paint brush you paint all the parts well in silver or the dark silver color. You can use any other color if you like but the silver one will give a more robot kind a feel to your robot wedding cake topper.

4. Using the hot glue integrate all the parts of the robots together. Put the head onto the head knobs and likewise attach the arms and the buttons that you arranged for it.

5. Put the robots to a wooden base and then put a wax paper on its bottom so that it may not damage the wedding cake by any means by all that paint and the hot glue used in its making.

Things to watch out for:
· It is really hard to cut the Balsa wood so use the sharpest knife that you have got with yourself or else it would get grained.
· Remember to put the entire robot cake topper on a wax paper before you actually put it onto the top of your wedding cake.